With so many types of yoga and instructors with various teaching styles, you could try several classes and find they are all quite different. However, I’d still be willing to bet you’d come across a few common poses! Today I’m focusing on four foundational standing poses and have outlined the benefits, proper technique, and common mistakes to avoid for each.
1. Chair Pose
What are the benefits:
- Strengthens the thighs, calves, and ankles
- Tones the core and upper back muscles
- Improves posture and balance
How to do it:
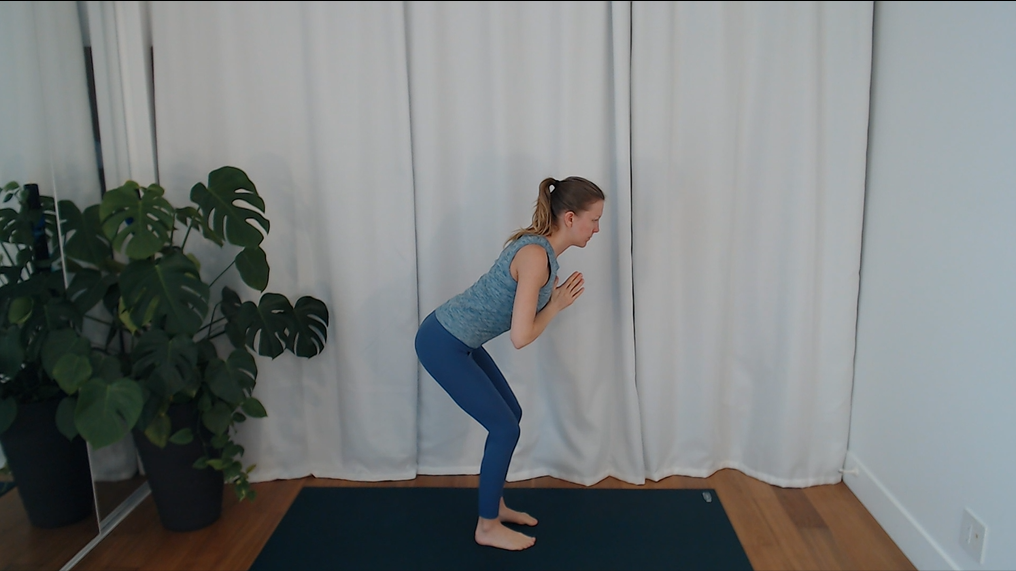
- Stand tall with your feet hip distance, hands pressed together in front of your chest, and draw your shoulders back.
- Bend your knees and hinge from your hips as you lower them as if sitting back into a chair.
- Keep your chest lifted, and engage your upper back and core.
- Press your weight into your heels.
- Hold the pose for 30 seconds to a minute, then release as you exhale and stand tall.
Increase the Challenge: Instead of hands in front of the chest, extend your arms overhead with your palms facing inward.

Mistakes to watch out for:
- Avoid pushing the knees forward and extending them beyond the toes. Doing so puts excess strain on your knees and ankles and results in less muscle activation in the intended areas. (Tip: to ensure you are not doing this, you can try standing 8-12 inches away from a wall, and make sure your bum touches the wall as you come into your chair pose)
- Avoid collapsing the chest or arching the lower back. Instead, maintain a neutral spine by activating the muscles in your upper back and abdominal muscles.
2. High Lunge
What are the benefits:
- Stretches and strengthens the legs, particularly the quadriceps and hamstrings
- Improves balance and stability
- Engages the core muscles
How to do it:
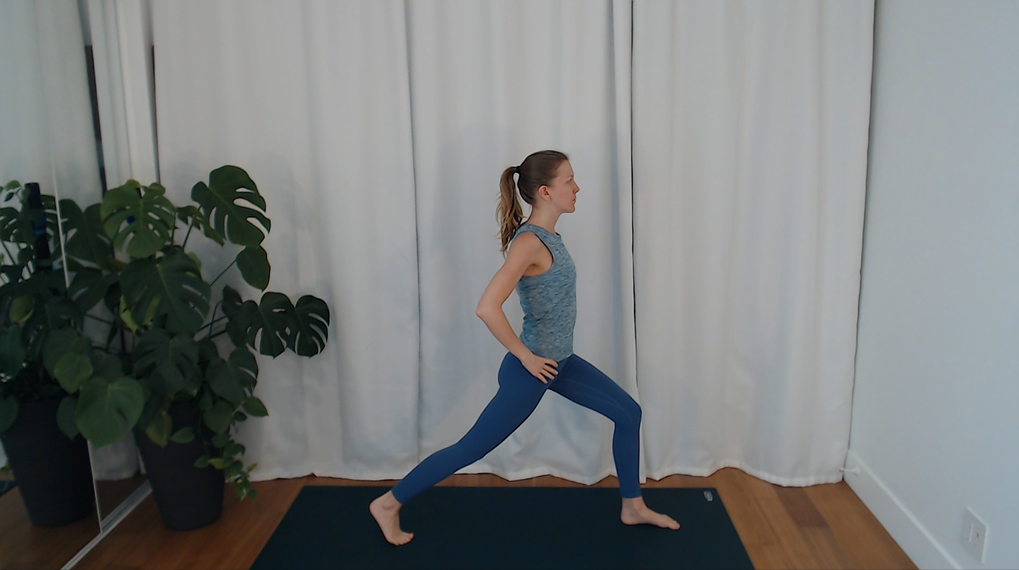
- Step one foot back about 3-4 feet, keeping the toes pointing forward.
- Bend your front knee so it stays directly above your ankle.
- Keep your back leg straight and strong with the heel lifted.
- Hands can rest on your hips or to the sides for more stability.
- Hold the pose for 30 seconds to a minute, then switch sides.
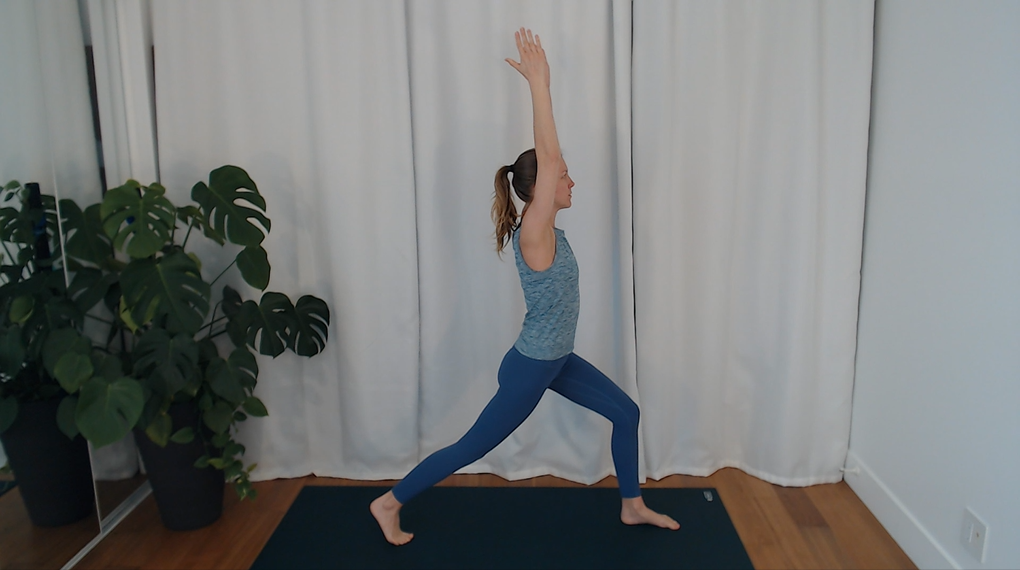
Increase the Challenge: Instead of hands on your hips, extend your arms overhead with your palms facing inward.
Mistakes to watch out for:
- Avoid allowing the front knee to extend beyond the toes.
- Avoid dropping the back heel or allowing the back knee to soften and bend.
- Avoid leaning forward, hunching the shoulders, or collapsing the chest. Your shoulders should stack over your hips.
3. Goddess Pose
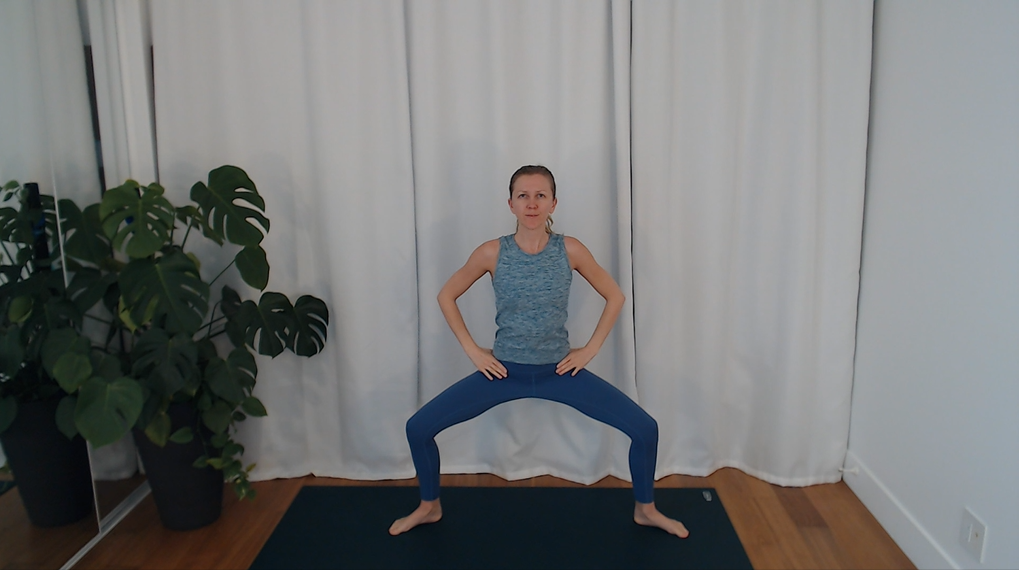
What are the benefits:
- Strengthens the legs, glutes, and core muscles
- Opens the hips and groin
- Improves balance and stability
How to do it:
- Stand with your feet wider than your hips and toes turned out at a 45-degree angle.
- Bring your hands to your hips and bend your knees deeply, lowering your hips towards the ground.
- Keep your spine tall with your chest lifted.
- Hold the pose for 30 seconds to a minute, then straighten your legs to release.
Increase the Challenge: Instead of hands on your hips, you can extend your arms to the sides, palms facing forward, and bend your elbows 90 degrees so your fingers point upward. Engage your upper back and draw your forearms back as much as possible, opening your chest.
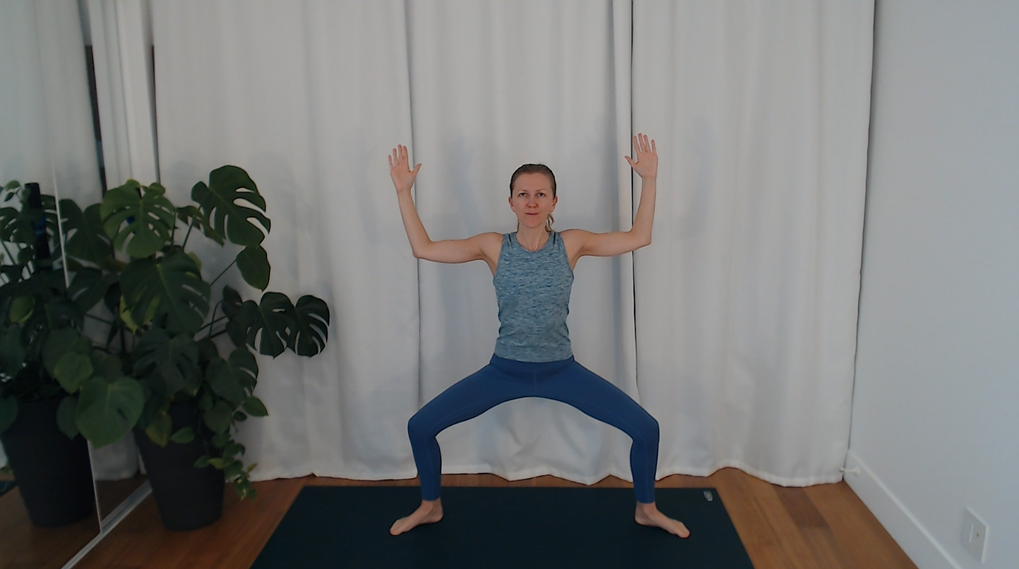
Mistakes to watch out for:
- Avoid allowing the knees to collapse inward or extend past the toes
- Avoid dropping the chest or rounding the spine
- Avoid tensing the shoulders or holding tension in the neck
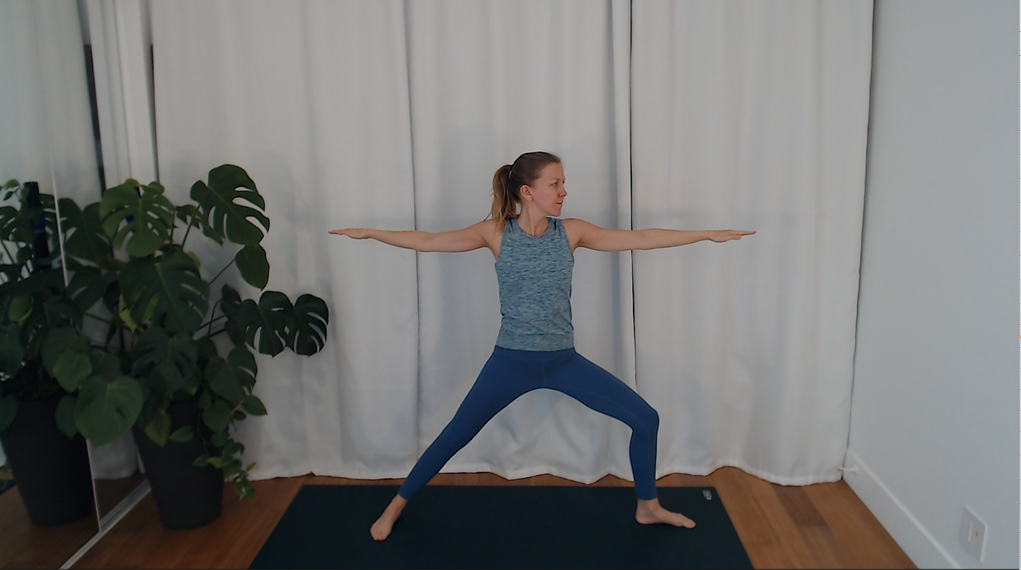
4. Warrior 2
What are the benefits:
- Strengthens the legs, arms, and core muscles
- Enhances hip flexibility and mobility
- Improves balance and stability
How to do it:
- Step your feet wide, about a meter, with your toes facing forward.
- Turn your right toes to the side (or as far as you can without turning your hips).
- Bend your right knee until it is directly above your ankle.
- Extend your arms parallel to the ground, reaching actively in opposite directions.
- Turn your head to gaze over your right fingertips.
- Hold the pose for 30 seconds to a minute, then switch sides.
Mistakes to watch out for:
- Avoid allowing the front knee to collapse inward or extend past the ankle
- Avoid dropping the back arm or hunching the shoulders
- Avoid turning the hips towards your bent knee
- Avoid pushing the hips back and leaning forward. Your shoulders should stack over your hips.
With these foundational standing yoga poses under your belt, you’ll be on your way to feeling confident in your yoga practice! Enjoy the journey, and try not to take it too seriously! As long as you’re not feeling sharp pain, the most important thing is to enjoy yourself and create a regular and lasting habit of moving your body, especially in the beginning stages. Remember that everyone’s body is different, and poses will look different from one individual to the next. Do your best and have fun!


