Take a moment to visualize what it looks like when sitting with poor posture. Typically the shoulders are rounded forward, the head juts forward and the spine is rounded, resulting in a slouched position. It’s probably not how anyone would like to look, however, it isn’t uncommon either.
That is because it is easier to sit this way. Sitting up tall requires muscle activation, which can get tiring. However, strengthening the areas that are needed means maintaining good posture becomes more manageable, even for extended periods.
Shoulders Rounding Forward
To avoid this, it’s important to strengthen our upper back muscles, which helps draw the shoulders back and open the chest. Additionally, when shoulders have stayed in a forward position for an extended period, this causes the chest muscles to tighten. So it’s crucial to also stretch these muscles as well.
The takeaway: Strengthen the upper back and stretch the chest
Head jutting forward
We need to first be conscious of this habit before we can prevent it. Many people don’t even realize they are doing it! However, it is so common it’s been labeled “text neck”. Strengthening the neck and upper back muscles will help you come back to proper posture.
The takeaway: Strengthen the neck and upper back
Slouching
To correct this we need to use our abdominal and back muscles to help maintain proper alignment of our spine. The key muscle that is absolutely crucial in this regard is the transverse abdominous. This muscle runs horizontally across the abdomen, wrapping around the sides of the torso like a corset.
The takeaway: Strengthen the transverse abdominous (the deepest abdominal muscle)
Improve Your Posture Routine
To help you begin, here’s a routine designed to target all the areas necessary for maintaining an upright posture more comfortably.
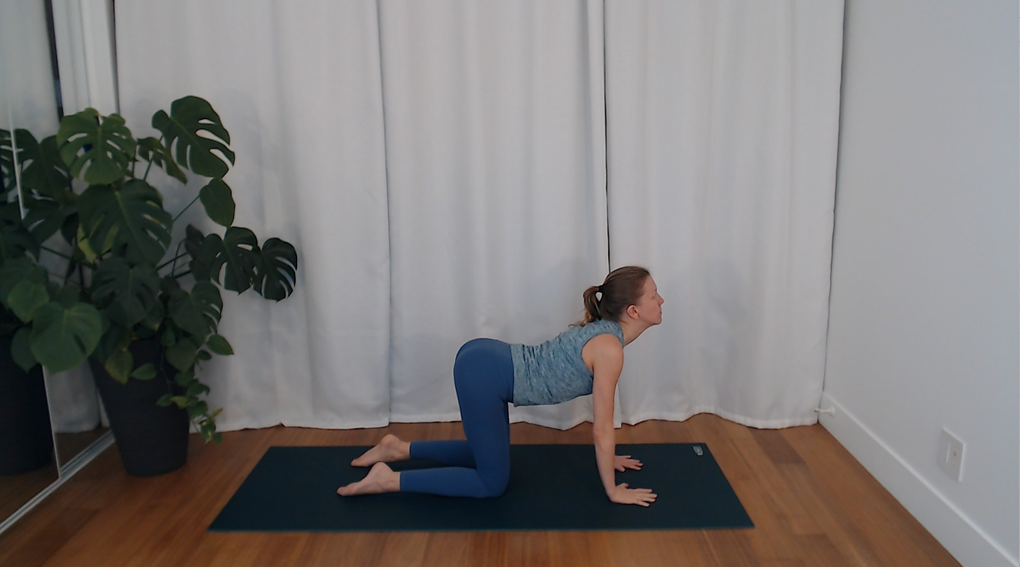
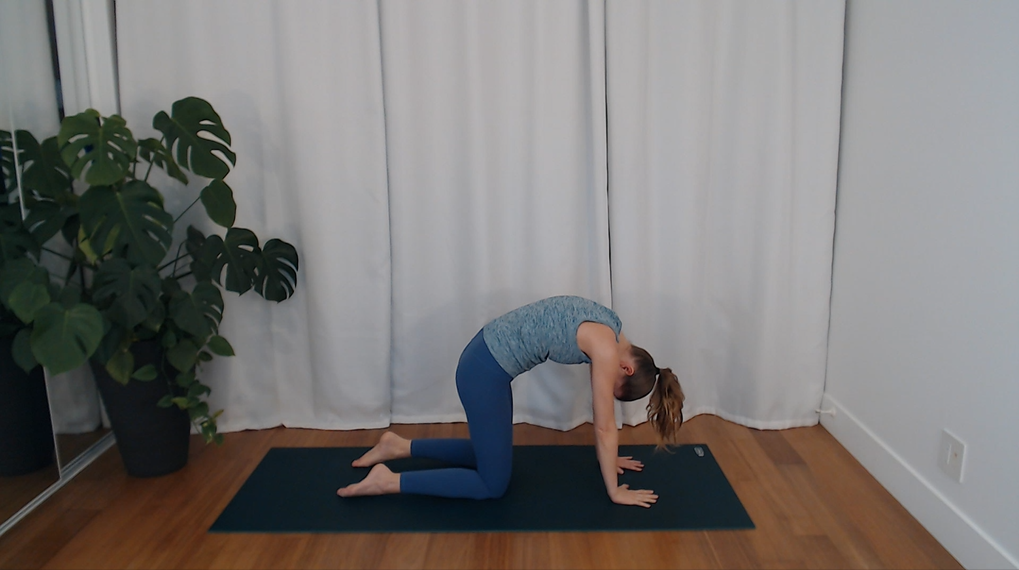
Warm Up with Cat-Cow
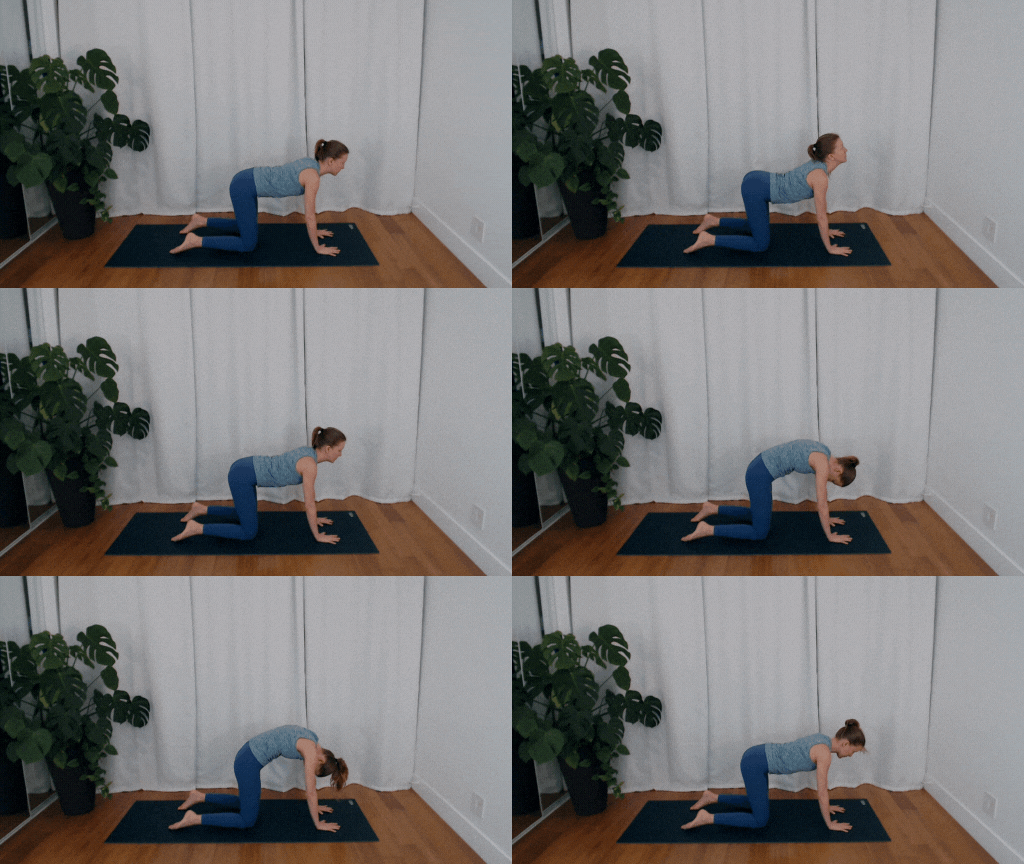
This warm-up will mobilize the spine and prepare your body for the following exercises.
- Start in a tabletop position (on your hands and knees)
- Inhale as you arch your back, pushing your abdomen and ribcage downward while looking forward gently (Cow Pose).
- Exhale as you round your spine, tucking your chin to your chest while also tucking your tailbone (Cat Pose).
- Repeat the sequence 8 times, moving with your breath.
Prevent the Head Jutting Forward with Neck Retractions
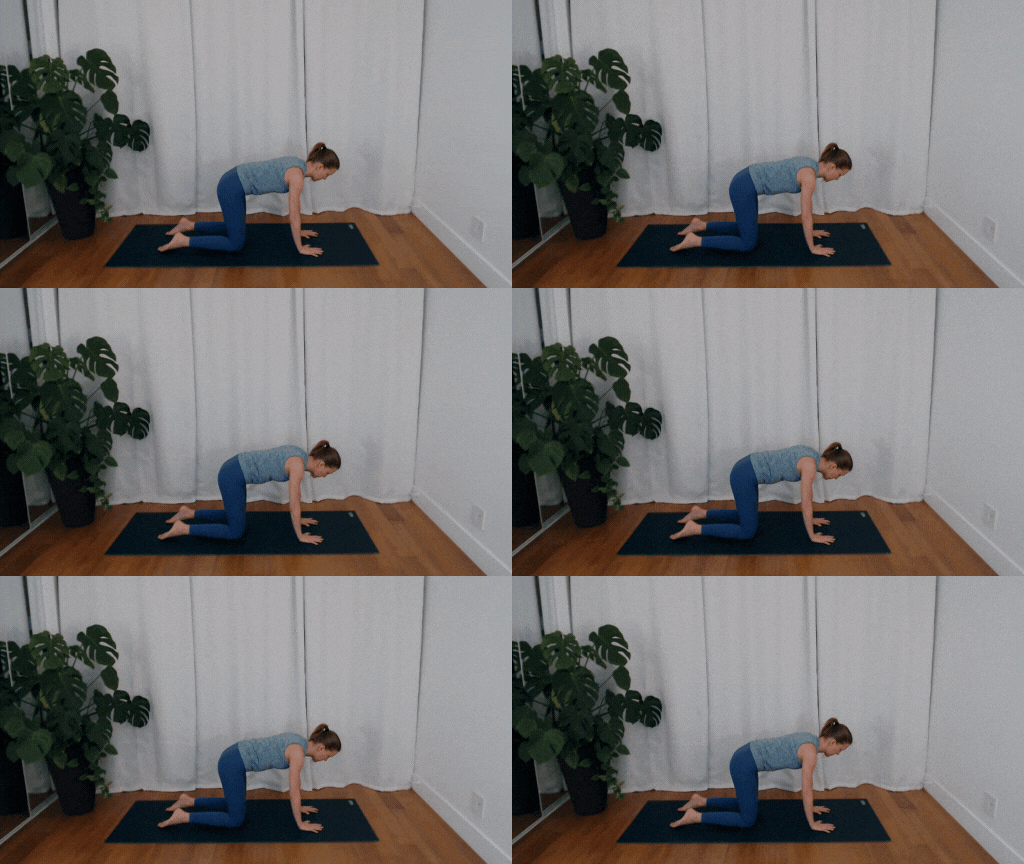
- Maintain a neutral spine in your tabletop. Your gaze should be down at the mat.
- Continue to look down, but allow your neck to relax so your head is drawn closer to the mat.
- Engage the muscles in the back of your neck to draw the head back and hold for a few seconds.
- Repeat this 8 times.
For the following exercises, maintain this position, with your neck muscles are engaged, and avoid letting your head jut forward.
Strengthen Transversus Abdominis with Bird Dog
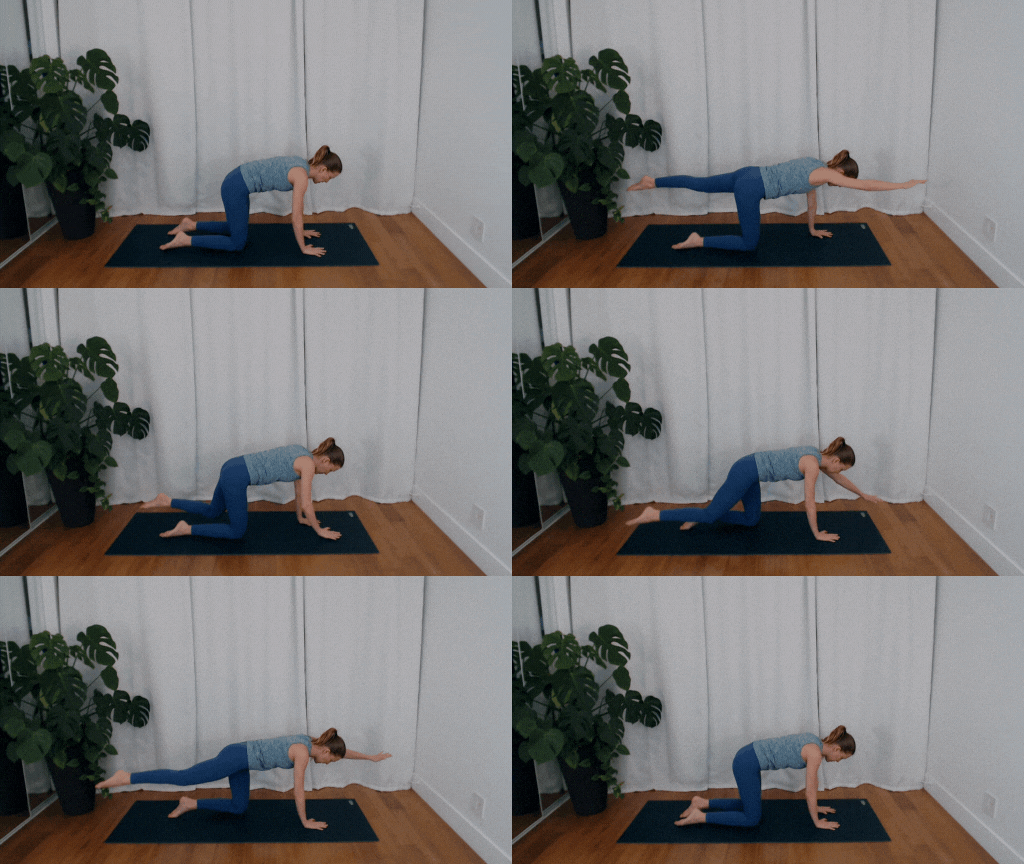
- Stay in your tabletop position and engage your core. (click here to learn how to engage your core)
- Extend your right arm forward and left leg back, maintaining a straight line from head to heel.
- Hold for a few seconds, then return to the starting position and switch sides.
- Complete 2-3 sets of 8-10 repetitions on each side
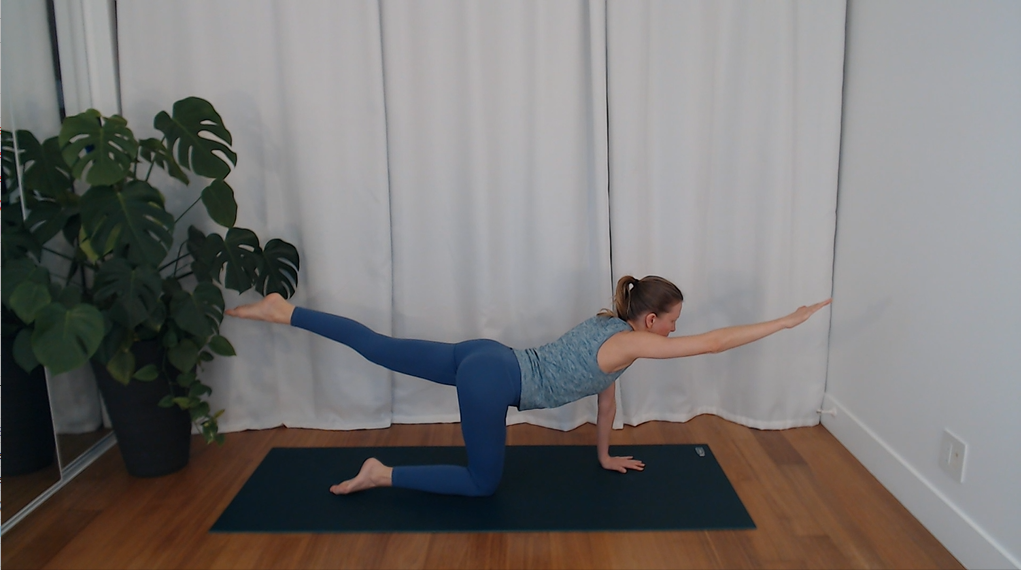
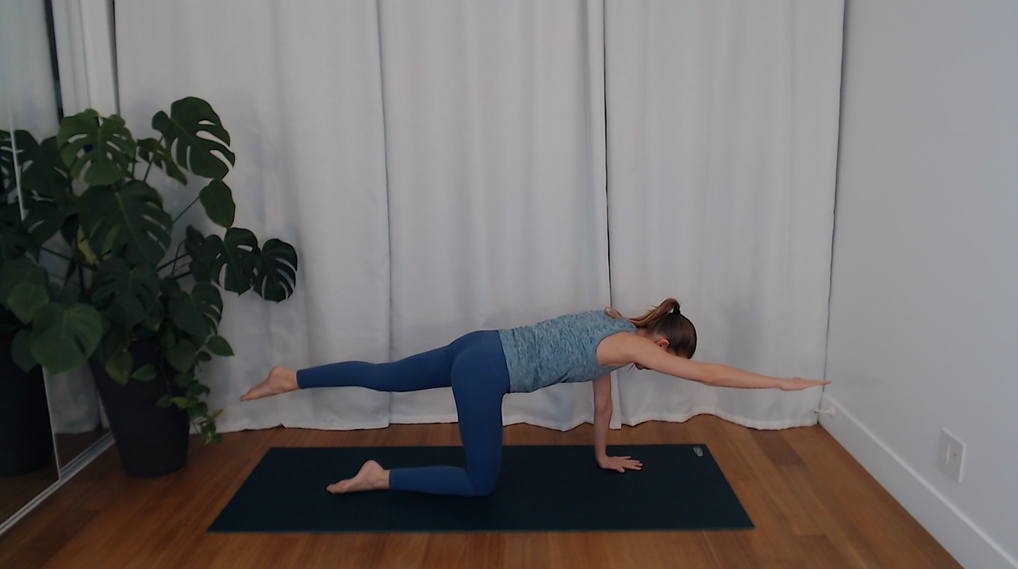
Tip: A common mistake is arching the back and relaxing the abdomen to lift the leg higher, but this defeats the purpose of the exercise. Maintain a flat back and only lift your leg as high as you can by using the muscles in your glutes and hamstring (bum and back of thigh).
Upper Back and Neck Strengthening – ‘W’ Superman Exercise
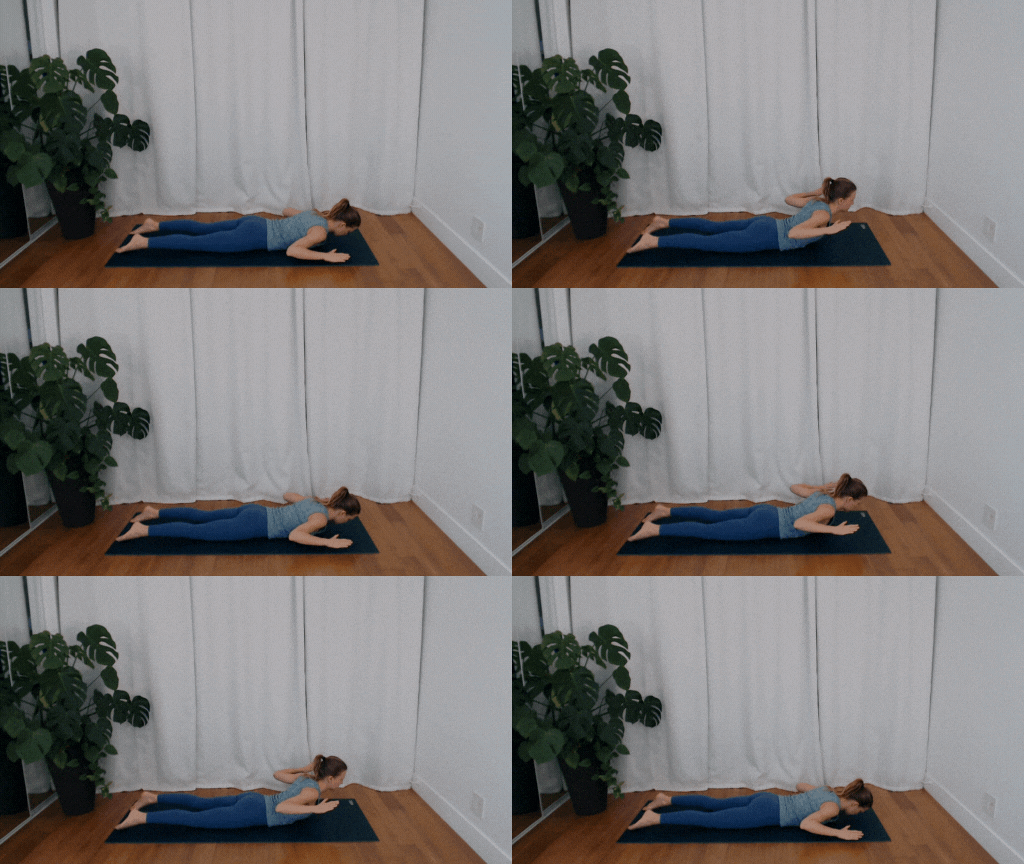
- Lie face down on a mat with elbows bent and tucked in towards your sides and hands flat on the floor near your shoulders. Your arms should resemble a ‘W’.
- Lift your head, chest, and arms off the ground simultaneously, focusing on engaging the upper back by squeezing your shoulder blades together.
- Keep your neck engaged as well so your head does not jut forward.
- Hold for a few seconds, then lower back down with control. Complete 2-3 sets of 8-10 repetitions.

Tip: At the start, you can take breaks between each lift by allowing your arms to rest back down on the ground. You can also rest your forehead on a yoga block or a stack of books for added support. As you strengthen, aim to lower until your head and arms are about an inch above the ground to maintain engagement before returning to the full lift.
Chest Opener Stretch
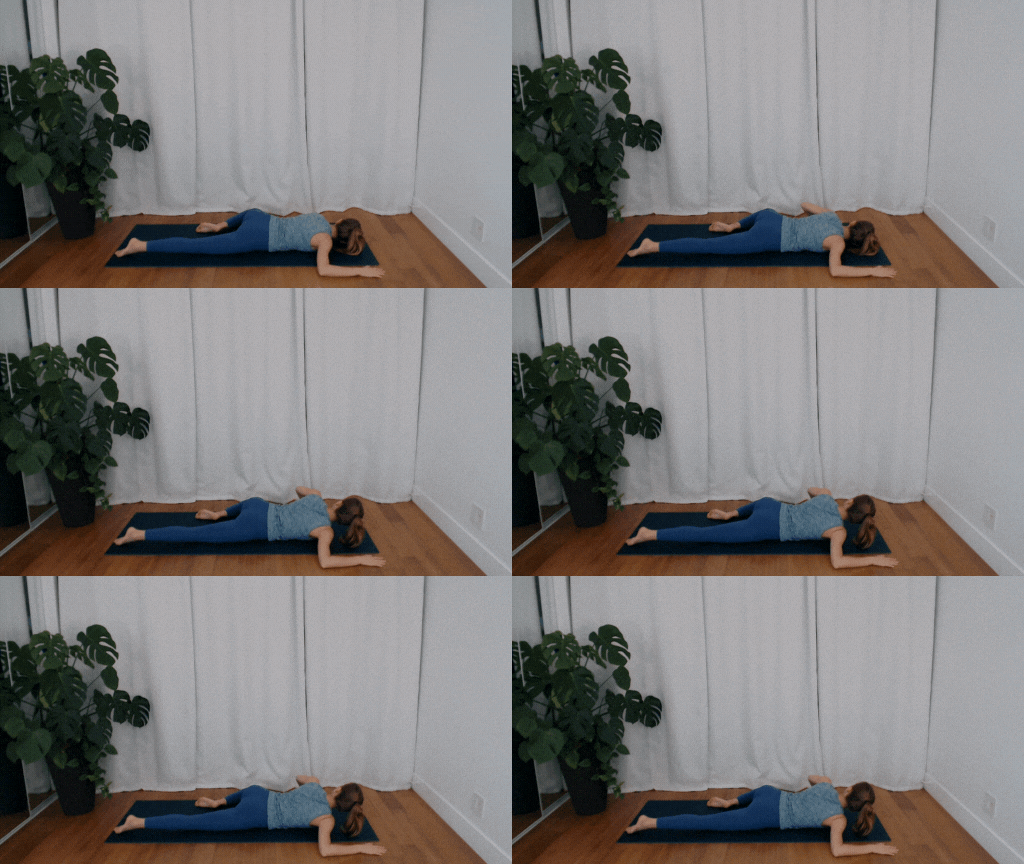
- Continue to lie down on your mat with your right arm extended out to the side at shoulder height, and your elbow bent to a 90-degree.
- Plank your left hand on the floor and use it to help turn your torso towards the left, until you feel a stretch across the right side of your chest.
- You may find it comfortable to have your left thigh extended out to the side with your knee bent 90 degrees
- You can either keep your head lifted or rest it on a pillow or yoga block as you hold the stretch for 20-30 seconds. Repeat on the other side to open up the chest and counteract the forward shoulder posture.
Tip: Feel free to make slight adjustments to this stretch until you feel it in the intended area. One suggestion if you don’t feel it, is to slide the arm of the side you’re stretching further towards that side. For instance, if you’re stretching the right side, try moving your right arm further to the right.
Cool Down and Stretching
- Return to your tabletop position and perform 5 repetitions of Cat-Cow.
- Next hold the Cow pose for 20-30 seconds, allowing the abdomen to relax and lengthen.
- Finish by holding the Cat Pose for 20-30 seconds, feeling the stretch across your back.
Perform this routine 2-3 times per week to strengthen the upper back, neck, and core muscles, and stretch the chest. Stay consistent and you will definitely notice a difference in your posture! Remember to listen to your body and modify exercises as needed to suit your fitness level and avoid injury. As your strength and flexibility improve, you can gradually increase the intensity and duration of exercises.

